
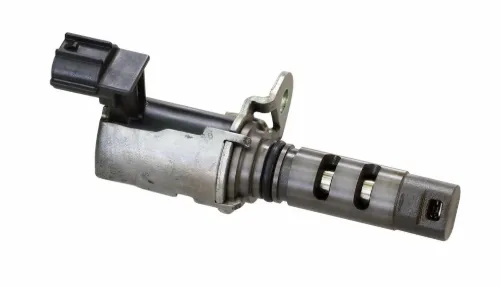
If your off-road machinery suddenly stops working as it should, there’s a strong chance the solenoid valve is clogged. This diminutive yet potent component assumes the critical responsibility of regulating the precise passage of air, oil, or fuel within the machine’s operational circuits. Upon its failure, the typical consequences encompass operational downtime, superfluous fuel consumption, and suboptimal system performance. The present compendium shall elucidate, with exactitude, the methodology to identify, remediate, and forestall solenoid valve failures in off-road machinery.
When to Replace a Solenoid Valve?
Even durable, industrial-grade solenoid valves in off-road equipment wear out over time. Their coils, diaphragms, and seals face extreme heat, pressure, dust, and vibration. This makes regular inspection critical.
Here’s a simple table to guide your decision:
| Condition | Can It Be Repaired? | Action |
| Broken coil wire | Usually not | Replace the coil only |
| Worn O-rings or seals | Yes | Replace internal seals |
| Heavy corrosion or a cracked body | No | Replace the entire valve |
| Frequent sticking or overheating | Sometimes | Check pressure/voltage first |
| Repeated electrical burnout | Rarely | Replace with a new solenoid valve |
As a rule of thumb:
- Repair if the problem is limited to replaceable components, such as coils or seals.
- Replace the valve body, core, or housing is damaged.
For machines that operate continuously in dusty or high-heat conditions — like forklifts in warehouses or excavators on construction sites — replacement may be necessary after 2 to 3 years of heavy use.
How to Fix a Clogged Solenoid Valve?
Fixing a clogged solenoid valve doesn’t need expensive equipment, but it does require careful handling to avoid contamination.
The process focuses on safe cleaning, part inspection, and proper reinstallation.
1. Identify the Problem
Start by observing how your valve behaves.
Common signs of clogging include:
- Valve opens or closes too slowly
- System pressure drops or fluctuates
- The machine reacts late when you activate a function
- Strange humming or clicking sounds
- Reduced fluid flow even though the pump runs normally
These telltale signs usually mean debris or residue is blocking the valve ports or the plunger chamber.
2. Cut Off Power and Depressurize the System
Before touching anything, disconnect power to the solenoid. For hydraulic systems, relieve pressure by cycling the controls with the engine off.
This prevents spills or sudden fluid bursts.
3. Remove the Solenoid Valve
Use a wrench or socket to detach the valve from your machine’s manifold or fluid line.
Mark the position of each connection before removal — it’ll help during reinstallation.
Keep a clean rag nearby to prevent dirt from entering the open hydraulic line.
4. Disassemble and Inspect for Clogs
Separate the coil (electrical section) from the valve body. Remove the plunger, spring, and inner parts carefully.
Look inside the valve for:
- Dried oil sludge
- Fine metal shavings
- Rust or scale
- Mud or dust from air lines
Use a flashlight or magnifying glass if needed. Most clogs appear at the inlet or exhaust ports where particles accumulate.
5. Clean Thoroughly
To clean the valve:
- Use compressed air to blow out any loose debris.
- Soak metal parts in a mild solvent or parts cleaner for 10–15 minutes.
- Gently brush with a soft nylon brush. Avoid steel tools that could scar surfaces.
- Dry with lint-free cloths. Never reassemble wet parts — moisture can cause corrosion.
For internal electrical parts (coils), do not submerge in fluid. Wipe them gently with a dry cloth only.
6. Examine Seals, Springs, and the Plunger
Dirt and oil buildup often damage O-rings, seals, and springs.
Check for cracks or flattening. If any are compromised, replace them using the same material type (rubber, PTFE, or Viton).
If the plunger doesn’t move easily, polish it lightly with fine sandpaper or replace it.
7. Reassemble and Install
Put the solenoid valve back together in the reverse order. Apply a small amount of clean lubricant to moving parts.
Reattach it to the system using the same fittings and orientation as before.
Make sure all connectors are tight and that there are no fluid leaks.
8. Test the Valve Function
Once everything is installed, reconnect the power and test the system. Watch for:
- Smooth, quick actuation
- Even pressure and temperature
- No abnormal noises or leaks
If the valve still reacts slowly, there might be hidden dirt deeper in the lines — flush the system before restarting operations.
Repair or Replace?
Generally, performing small repairs can restore basic performance.
However, if you face repeated coil failures, leaks, or inconsistent actuation, it’s often better to replace the entire valve assembly.
In such cases, a durable and cost-effective option like the solenoid valve available at FridayParts provides a reliable solution. Their aftermarket valves are designed to match off-road operating conditions — resisting vibration, temperature changes, and heavy hydraulic use — while maintaining OEM-quality performance.
Tips for Extending Solenoid Valve Lifespan
- Keep fluids clean. Dirty oil or contaminated diesel can block the plunger and cause valve sticking.
- Check mounting orientation. Mount valves upright to prevent sediment from settling on the actuator.
- Inspect wiring regularly. Secure connectors and prevent corrosion with dielectric grease.
- Avoid continuous energizing. Continuous current causes coil overheating; use duty-cycle‑rated models.
- Maintain stable pressure. Exceeding rated hydraulic pressure damages seals and shortens service life.
- Clean regularly. Schedule cleaning every 500 to 1,000 working hours, especially for excavators or loaders in muddy conditions.
- Use compatible fluids. Always check that your hydraulic oil or fuel does not degrade seal material — it’s a small step that prevents larger failures.
Conclusion
Even the most resilient off‑road machinery may be rendered immobile by the malfunctioning of a solenoid valve; nevertheless, through punctual inspection, meticulous maintenance, and the acquisition of appropriate replacement components, one may perpetuate the reliable operation of every subsystem. The removal of accumulated detritus, the verification of electrical potential, and the substitution of deteriorated seals shall rectify the majority of issues ere they escalate. In instances necessitating entire replacement, the selection of a superior aftermarket unit assures that one’s investment yields extended durability and optimal performance.

